1. Why Waterproofing Inside Basement Matters
Moisture is one of the biggest threats to any home, and waterproofing inside basement is essential for protecting structural integrity, property value, and indoor air quality. Basements naturally sit below ground, making them more vulnerable to groundwater seepage, hydrostatic pressure, foundation cracks, and humidity accumulation.
Ignoring moisture problems can lead to:
-
Mold and mildew growth
-
Damaged flooring and walls
-
Foundation weakening
-
Electrical hazards
-
Unhealthy indoor air
-
Costly long-term repairs
Homeowners often mistakenly assume basement waterproofing must be done outside, but internal waterproofing is one of the most effective and affordable solutions—especially when exterior excavation isn’t possible. More people are searching online for waterproofing inside basement because it offers fast installation, lower cost, and immediate moisture control without major construction.
2. Common Causes of Basement Water Problems
Before beginning waterproofing inside basement, it’s important to understand where the moisture is coming from. The most common causes include:
✔ Hydrostatic Pressure
This occurs when groundwater presses against the foundation walls, forcing moisture inside through pores or cracks.
✔ Foundation Cracks
Even hairline cracks can seep water during rain or snowmelt.
✔ Poor Exterior Drainage
Improper grading, clogged gutters, and short downspouts push water toward the foundation.
✔ High Indoor Humidity
Basements often trap humid air from laundry, HVAC systems, or poor ventilation.
✔ Condensation Issues
Cold concrete walls cause warm indoor air to condense, creating water droplets.
By identifying the root cause, homeowners can determine the correct interior waterproofing method to achieve long-term dryness.
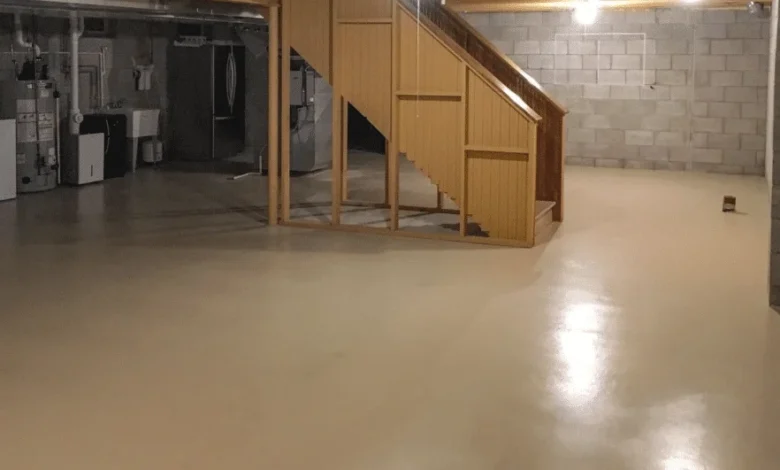
3. Best Methods for Waterproofing Inside Basement
There are several proven techniques for waterproofing inside basement, each designed for different levels of moisture intrusion.
1. Interior Sealants and Waterproof Paint
Ideal for minor dampness or surface moisture.
These products fill porous concrete to block small leaks and reduce condensation.
2. Epoxy Injection for Crack Repair
Hairline or medium cracks can be sealed with epoxy or urethane foam, permanently stopping water from entering.
3. Interior French Drain System
One of the most effective solutions.
A trench is installed along the basement perimeter directing water into a sump pump system.
4. Sump Pump Installation
A sump pump removes collected water from the basement and drains it safely away from the home.
5. Vapor Barriers & Moisture Membranes
Commonly used with finished basements, these prevent moisture from reaching drywall and insulation.
6. Dehumidifiers
A high-capacity dehumidifier reduces humidity, preventing mold and musty odors.
Choosing the right method depends on the severity of the water issue and your foundation type.
4. Step-by-Step Guide to Waterproofing Inside Basement
Below is a general process used by professional waterproofing companies:
Step 1: Inspect and Identify Moisture Sources
Look for stains, musty smells, visible cracks, peeling paint, or puddles.
Step 2: Clean and Prepare the Basement Walls
Remove loose paint, wash down concrete, and dry the area thoroughly.
Step 3: Seal Cracks and Holes
Apply epoxy or hydraulic cement to any visible cracks.
Step 4: Apply Interior Waterproof Coatings
Use waterproof paint, sealants, or membranes on walls and floors.
Step 5: Install an Interior Drain Tile System
If moisture is severe, a French drain or trench system is installed along the wall base.
Step 6: Add a Sump Pump System
This ensures constant water removal, even during heavy rain or snowmelt.
Step 7: Manage Interior Humidity Levels
Use dehumidifiers to maintain safe humidity between 40–50%.
When performed correctly, interior waterproofing can eliminate ongoing water problems permanently.
5. Cost of Waterproofing Inside Basement
The cost of waterproofing inside basement varies depending on moisture severity and chosen method:
| Waterproofing Method | Average Cost |
|---|---|
| Waterproof Paint | $150–$400 |
| Crack Injection | $300–$900 per crack |
| Interior French Drain System | $2,500–$8,000 |
| Sump Pump Installation | $800–$2,500 |
| Vapor Barrier Installation | $1,000–$4,000 |
| Full Interior Waterproofing Package | $3,000–$12,000 |
Interior waterproofing is typically 50% cheaper than exterior excavation, making it a cost-effective solution for most homeowners.
6. When to Hire a Professional for Basement Waterproofing
DIY waterproofing can work for small moisture problems, but professional help is recommended when:
-
Water enters during heavy rain
-
There is visible mold or musty odor
-
Foundation cracks run horizontally or vertically
-
Floors show signs of buckling or moisture
-
Standing water persists longer than 48 hours
-
You plan to finish or remodel the basement
A certified waterproofing specialist can perform an advanced diagnosis and install systems like internal French drains, sump pumps, and vapor barriers for long-term protection.
Conclusion
Waterproofing inside basement is one of the most effective ways to protect your home from moisture damage. Whether you are dealing with minor dampness or significant water seepage, interior waterproofing solutions such as crack repair, sump pumps, vapor barriers, and French drain systems provide reliable protection at a practical cost.
By taking early action, homeowners can prevent structural issues, improve indoor health, and secure long-term safety for their property.